Get ready to have a blast this Christmas season with your loved ones as you embark on a creative journey of making your own holiday crafts. It’s not just about the joy of festivals but also about the excitement of adorning our homes with unique and personal decorations. In India, where diversity and creativity shine during celebrations DIY Christmas decorations provide a wonderful opportunity for families to bond and create cherished memories.
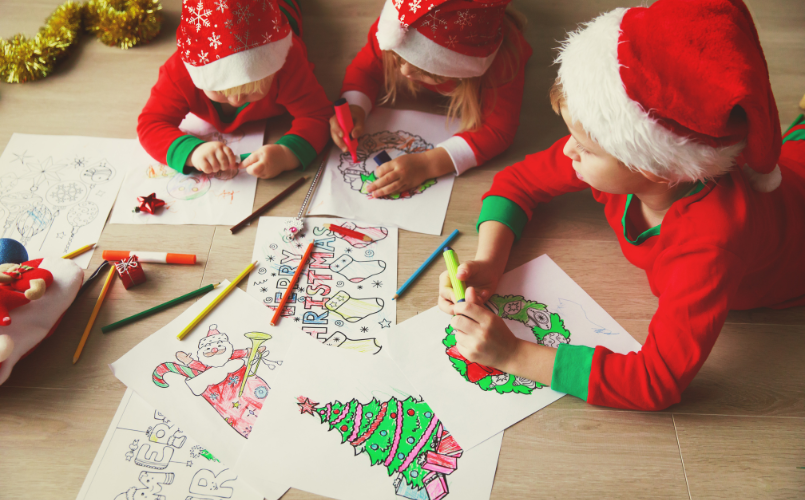
Transform your living room into a wonderland filled with ornaments that carry the imagination and effort of your children. The sheer pride in their eyes when they see their handmade crafts becoming a part of your Christmas celebration is truly priceless. So why not take a break from store bought decorations this year. Dive into the world of DIY crafts? Whether you’re new to crafting or an yourself an expert we’ve got some enjoyable projects that are perfect for families who want to add that personal touch to their holiday decor.
In this post we’ll guide you through a series of DIY Christmas decoration projects for young children that are easy to follow. These projects are designed not to bring out the artistic side in children but also to create lasting memories for the whole family in a safe and enjoyable way.
Alright let’s gather all the supplies we need to begin this DIY adventure! Check out the next section where we’ll talk about the materials and setup required for your DIY crafting session. It’s crucial to ensure an enjoyable experience for everyone involved.
Materials and Setup for DIY Christmas Decorations
Before we dive into the world of crafting it’s essential to have the right materials ready. The beauty of DIY Christmas decorations lies in their simplicity so there’s no need for anything fancy. Here’s a basic list to help you get started;
- Colored Paper/Cardstock; This is a must have for crafts like cards and snowflakes.
- Scissors; Make sure they are child friendly if younger kids are participating.
- Glue and Tape; Opt for toxic options especially when working with little ones.
- Markers, Crayons and Paints; These will add color and personal touches to your creations.
- Ribbon, Yarn and Fabric Scraps; Perfect for giving your decorations a flair.
- Recycled Materials; Repurpose cardboard rolls, old CDs or bottle caps.
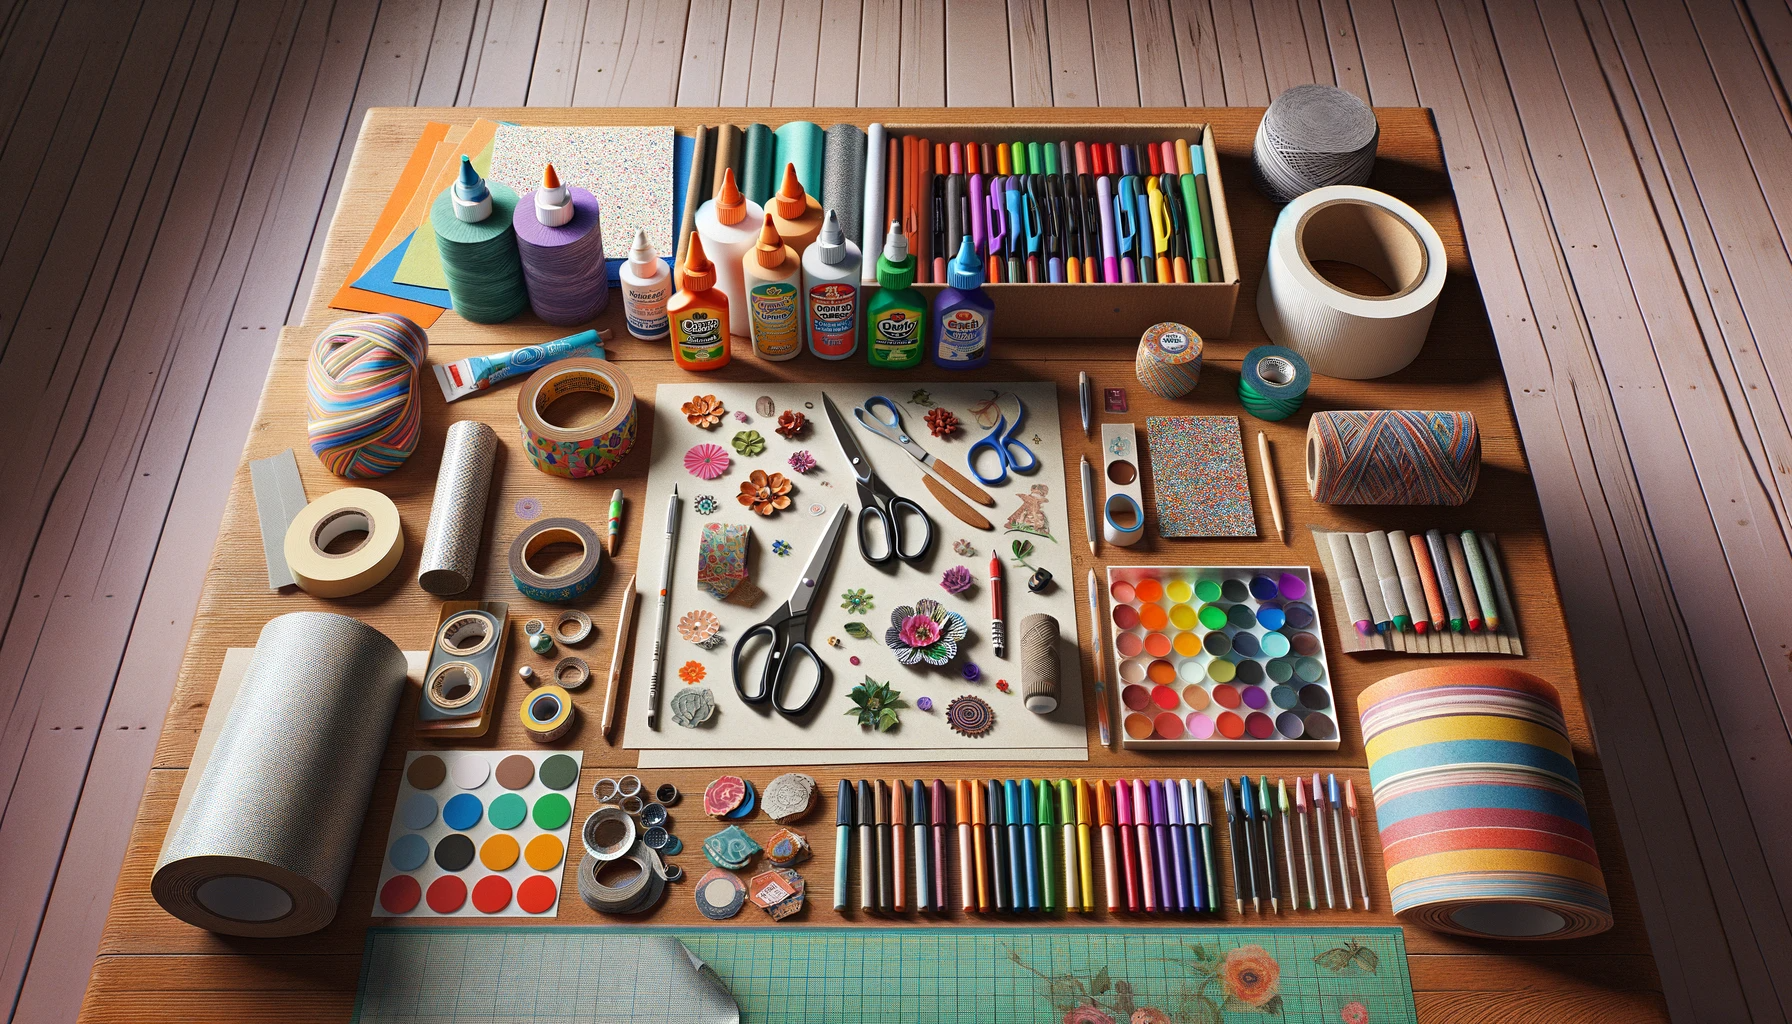
Remember that setting up a dedicated space for crafting is just as important as having the right materials! Make sure you choose a lit area with enough space for all your materials and for children to work comfortably. It’s a good idea to cover your work surface with newspaper or a cloth to make cleaning up easier.
When it comes to crafting, kids’ safety is of importance. Here are some tips to ensure a crafting environment; Always supervise children especially when they are using scissors or other sharp tools. Use child friendly tools like blunt edged scissors and non-toxic glues and paints. Organize your materials beforehand to prevent any potential hazards such as spills or cuts. Take this opportunity to teach children about safety, such as the correct way to use scissors.
Now that you have gathered your materials and learned some safety tips, you’re all set for a crafting session, with your kids. In the part we will begin our first project. Creating handmade Christmas cards. It’s a heartfelt way to spread festive cheer.
Easy DIY Christmas Decorations Projects
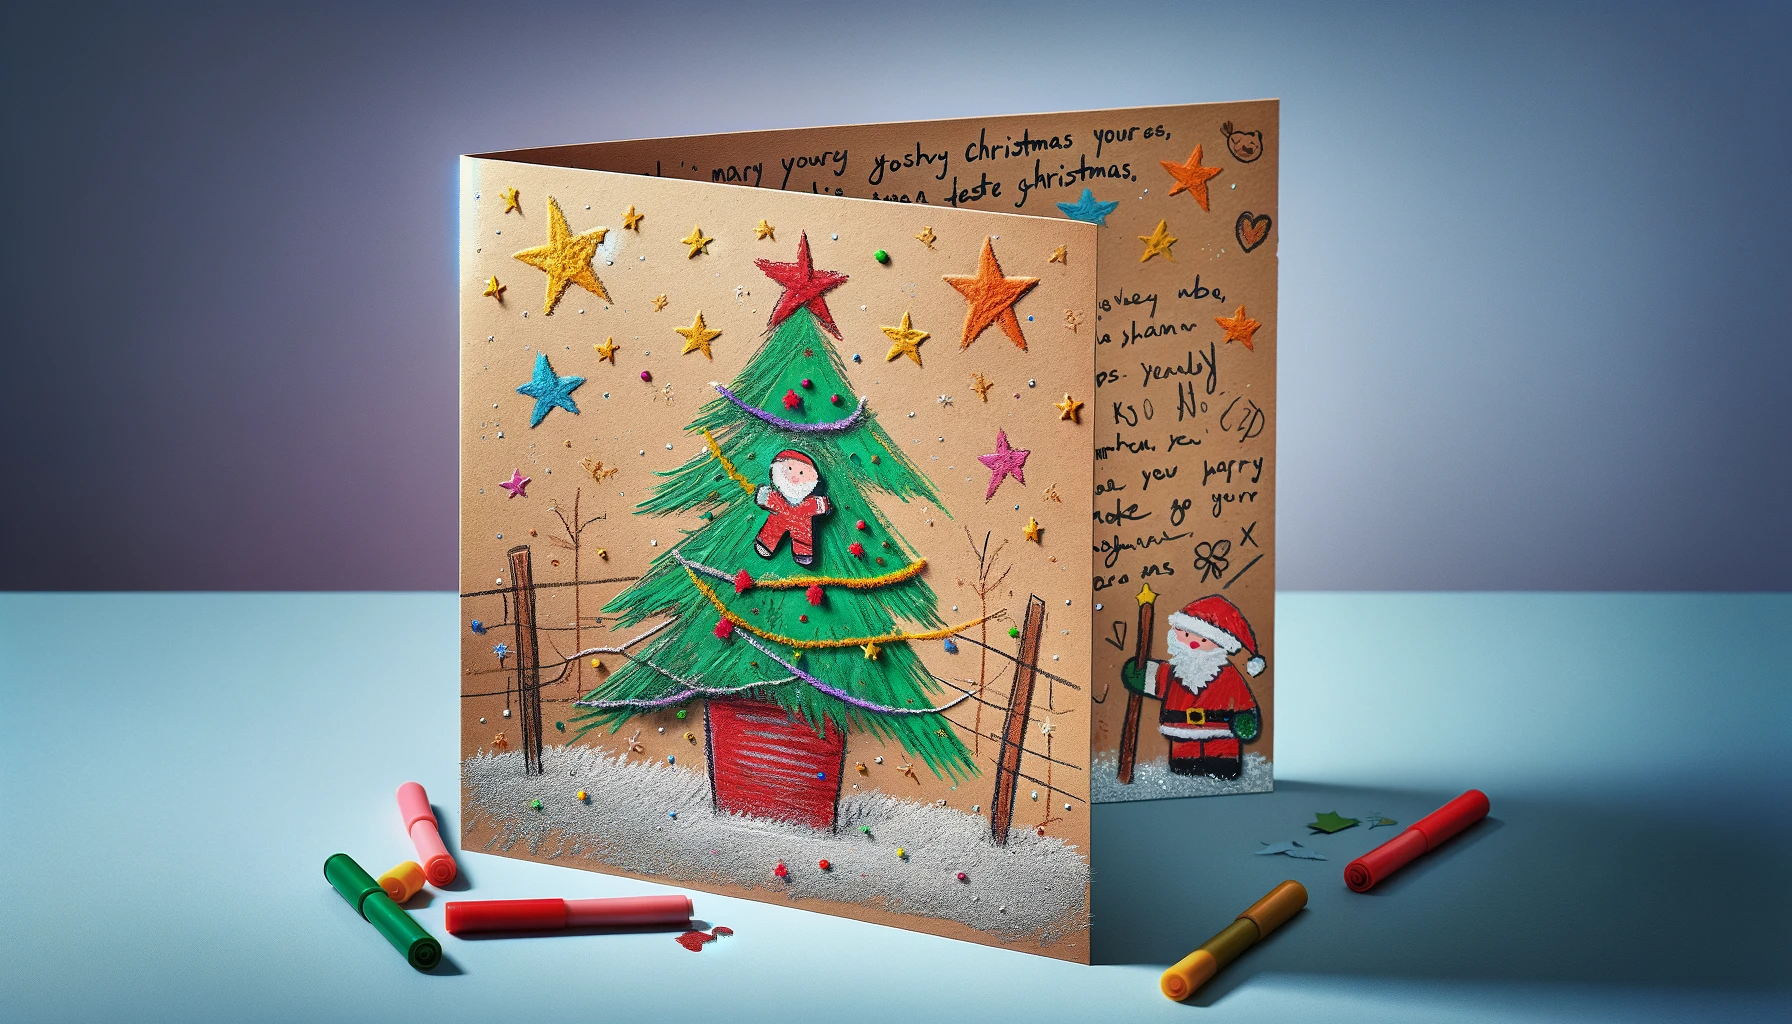
Handmade Christmas Cards
Making Christmas cards is an excellent way for your family to send personalized greetings. Here’s how you can create them; For this project you will need cardstock, markers, glue and any decorative items like glitter or stickers.
- Start by folding the cardstock to create a card.
- Let your child get creative and draw or paint a design on the front. Popular themes include Christmas trees, stars and Santa Claus.
- Add a touch by using glitter, stickers or even adding a small photo.
- Write a message inside the card. Your child can also add their signatures or handprints for a personal touch.
Festive Paper Snowflakes
Paper snowflakes are timeless and incredibly easy to make. They are perfect for decorating windows or walls.
For this project you will need colored paper and scissors.
- Start by folding the paper into a triangle times until it becomes small and thick.
- Allow your child to cut shapes along the folded edges and at the tip of the triangle.
- Carefully unfold the paper to reveal a snowflake pattern that your child has created.
- Hang up the snowflakes using thread. Stick them onto surfaces, with tape.
Remember, each snowflake is unique! Encourage your children to experiment with cuts and patterns. 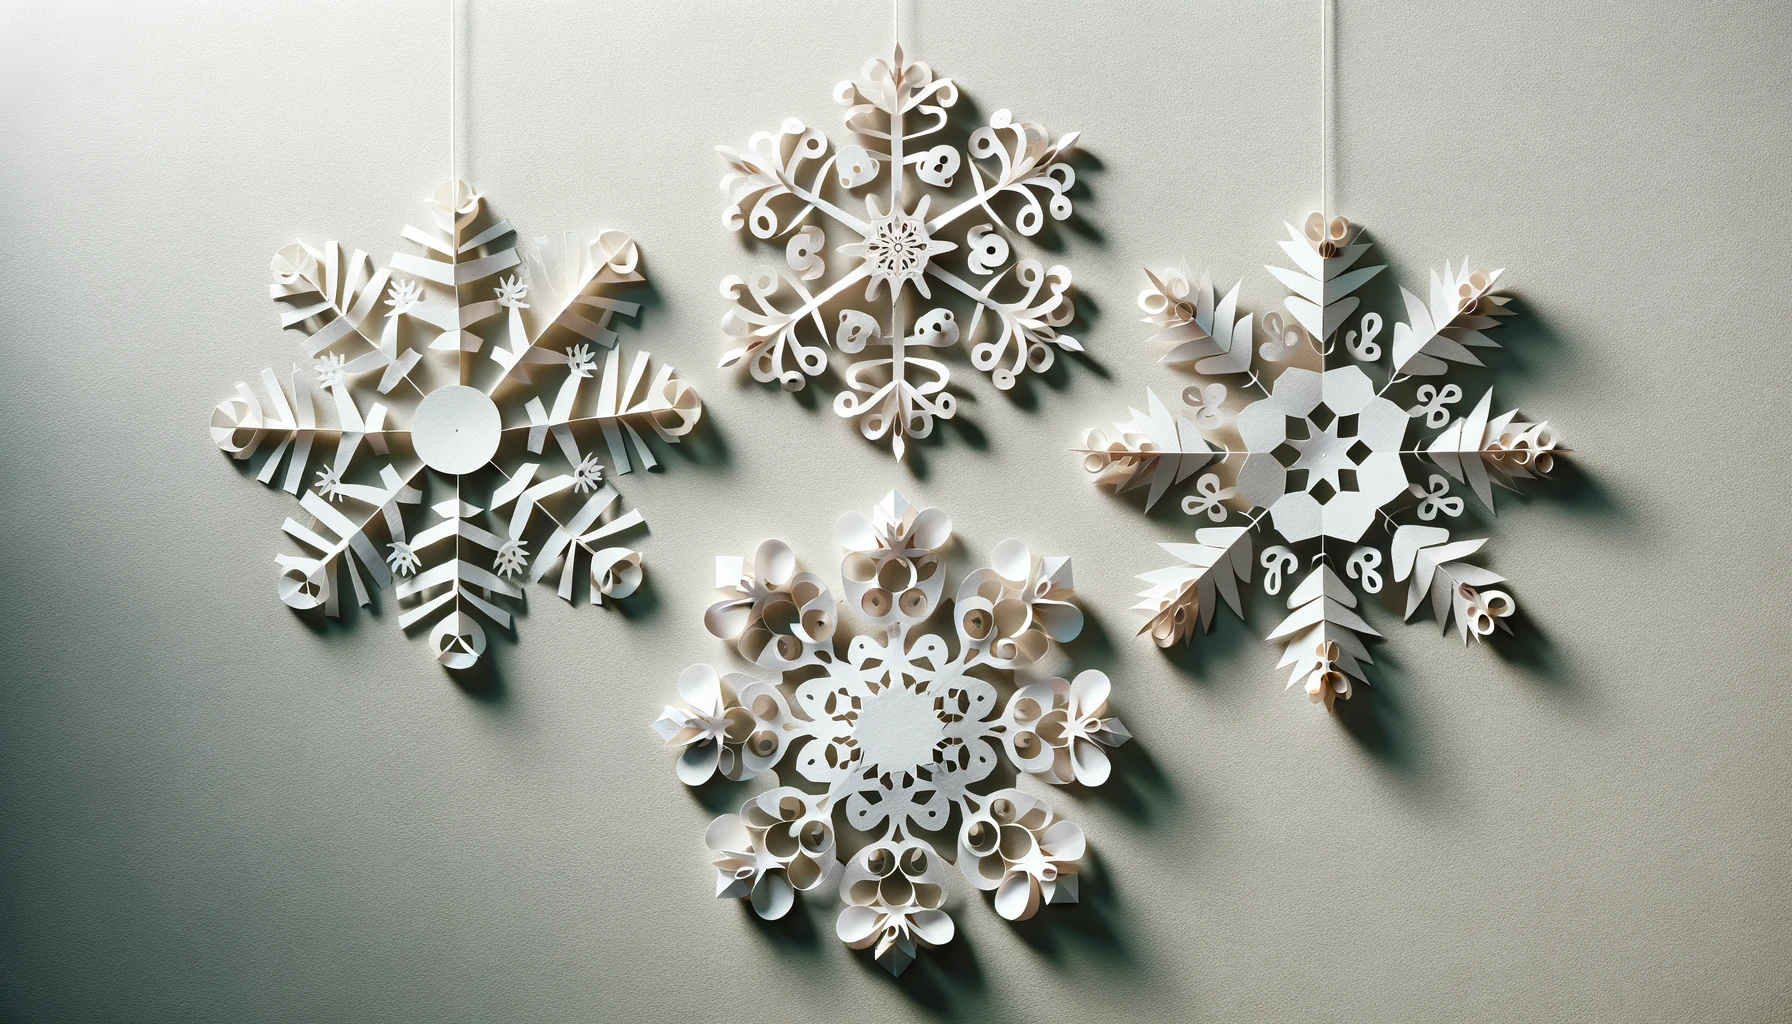
In the section we’ll delve into some imaginative ideas to add an extra touch of magic to your holiday decorations. We’ll explore DIY Christmas ornaments and decorative wreaths that can truly elevate the spirit.
Crafting your Christmas ornaments can be a delightful activity for the whole family. Here’s a simple method you can follow;
Materials needed; Cardstock or old CDs, ribbon, paint, glitter and glue.
- Cut out shapes like stars, bells or Christmas trees from the cardstock. If you’re using CDs instead feel free to paint them over.
- Get creative with paint, glitter and various craft materials to decorate the ornaments.
- Make a hole at the top of each ornament and thread a ribbon through it for easy hanging.
These homemade ornaments not add a personal touch to your Christmas tree but also make wonderful gifts for loved ones and friends.
Decorative Christmas wreaths are another way to welcome guests with festive cheer. Here’s a straightforward version that even children can assist in creating;
Materials required; A paper plate, green paper or fabric decorative items like ribbons, beads or pinecones well, as glue.
- Cut out the center of the paper plate to form a ring shape.
- Wrap the ring with paper or fabric for an authentic look.Step 3; Use ribbons, beads and other materials to add a touch of festivity to your creation.
- Attach a looped ribbon at the top for hanging.
This simple project allows children to showcase their creativity while contributing to the ambiance of your home.
Displaying Your Masterpieces of DIY Christmas Decorations
Now that you and your little ones have crafted an array of Christmas creations it’s time to proudly display them in your home. Here are a few ideas;
- Christmas Cards; Hang them on a string along a wall or place them gracefully on your mantelpiece.
- Paper Snowflakes; windows with these delicate creations or suspend them from the ceiling using thread for an enchanting snowfall effect.
- Ornaments; Embellish your Christmas tree with these ornaments or hang them in doorways for added festive charm.
- Wreaths; Place your wreath on the front door or, above the fireplace as a welcoming symbol of the season.
Seeing these decorations adorning your home will fill you and your family with a sense of pride and holiday cheer.
Sharing the Delight
Remember to spread the joy of your family creativity. Capture photos of your decorations and share them with loved ones through social media or messaging apps. This can inspire others to partake in activities and embrace the joyful spirit of the season.
You can also motivate your kids to share some of their handcrafted items with neighbors, friends or family members. It’s a gesture that spreads happiness and demonstrates care during this festive time.
Lastly take a moment to contemplate the time spent crafting. It’s not only about the decorations. Also, the memories made, and the joy shared. This experience will undoubtedly be treasured by your children, remembered for many Christmases to come.